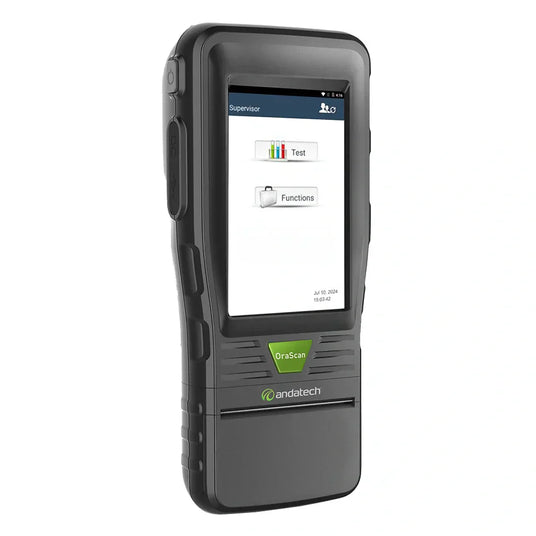
Thank you for purchasing an Andatech® DrugSense® OraScan advanced drug test analyser.
The OraScan ensures accurate interpretation of drug test results by eliminating common user errors (such as using expired test cassettes) and interpretation mistakes (such as oversight of the control line or mistakes in reading positive and negative results).
With advanced features such as record keeping, built-in printer and data upload via USB, Wifi or 3G, the Orascan is a crucial device for any application that requires accurate drug testing with no room for error.
Please read the operation manual carefully and familiarise yourself with the unit’s operation before using. Retain this manual for future reference.
Device features

Operating instructions

1. Wear a pair of gloves to conduct the test. Open a new test pack, remove the test cassette and the sample collector.
2. Press the power button to switch on the OraScan analyser. Wait for the screen to warm up.
Once the password page comes up, set the password as 88888888, then you will enter the home menu.
3. Press the “Test” icon on the OraScan to start a new test. Enter the information of the test. Empty fields will not appear on the record printout.

4. Scan the barcode label of the test cassette.
5. Details of the test cassette will be displayed. Press the arrow to continue.
6. Place the sample collector sponge into the testee’s mouth. Ensure the testee wipes the inside of the mouth, cheeks, cavities and surface of the tongue.

7. Place the sponge under the tongue. Leave it in the mouth for 3 minutes and until the colour indicator on the sample collector sponge changes to red.
8. Insert the sample collector into the test cassette as shown above, twist the sample collector until it locks in place.
9. Wait until the control lines show up.
10. Insert the cassette into the device.

11. Once the cassette is inserted, the device will start reading the results. It will take a few minutes for the test result to be stabilised. Please wait (pressing the Skip button will display the result immediately, but this is NOT recommended). After the result has stabilised, it takes a few seconds to confirm the result.
12. The results will be shown on the screen. Press arrow to continue.
13. If drugs are detected, please arrange for a confirmatory lab test.

14. If the test cassette fails to work or any control line does not show, the test is “invalid”. Repeat the test with a new test cassette.
15. Print the test record if necessary. Empty fields will not appear on the printout.
Settings
Press the “Function” icon to enter the function settings.

Setting
Settings for backlight level, timer for stabilising result, auto backlight off time and auto off time.
GPS
- Longitude and Latitude of device’s location will be shown.
- Longitude and Latitude of the test is stored and printed on the printout.
NOTE: The GPS system only functions 5-10 minutes after the device is switched on. It can only receive signals in open areas.
If there is no GPS signal, the Longitude and Latitude will not be shown on the printout.
Network
Settings to connect to 4G network.
Note: 4G simcard capability is optional and only available upon request when you purchase your device.
WiFi
Wifi connection settings
Record
Over 100,000 test records can be stored with the photo of the test subjects.
- Select the record and view the details of the test record. Individual test records can be printed.
- Press to search test records by fields and press to confirm.
Info
Check the software version of the device.
Time
Adjust date and time settings for the device.
Advanced settings
Only authorised personnel with the password are able to enter the advanced settings menu.

Printer
A built-in thermal printer is used for the device.
Insert / replace paper
- Pull the handle to open the printer cassette and insert the thermal paper.
- When inserting a new roll of paper, ensure that the glossy side of the paper is kept close to the indentation.
NOTE: If nothing can be printed, change the orientation of the paper roll and try again.
The device uses standard thermal printer paper.
OraScan software instructions
Note: This software has been tested on Windows 10 and 11.
File requirements
Please download the following files to your computer before proceeding (compatible with Windows only).
Installing Android-Adb-Driver for Windows
Turn the device ON and connect the device with the provided USB.
Go to Device Manager (note: Right click on the Windows icon located at the bottom left corner and select Device Manager).

Find AOSP on Drone in the Universal Serial Bus Devices (USB). Right Click and select Update Driver.

Select Browse my computer for drivers.

Select the Driver where it was downloaded before.
In this instance android-adb-driver folder is located at.
For example: “C:\User\username>\Downloads\android-adb-driver".

Once the installation is complete, it will show below - Android Composite ADB Interface.


Installing OraScan Software
Ensure you have downloaded the file "Orascan-Downloading-Software" linked above.
Open the folder and open file Orascan WDTP-10.exe


While the device is on, connect your device with the provided USB Cable.
Select “Get Serial No.”

The device serial number should appear like the example image above.
If the error appears like below....

...check your OraScan device for the following pop-up message.

On your OraScan device, tick the check box and click OK to proceed.
Then select “Get Serial No." again.
The software should proceed successfully in downloading the data from your device to the computer.


