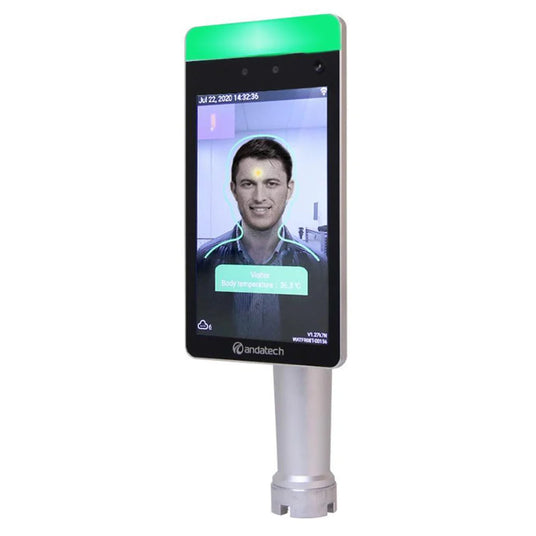
Thank you for purchasing the Andatech Accesspoint FRX temperature screening device.
Refer to the letter included with your device for a link to the full user manual with advanced settings and Andalink guide for the Andatech Accesspoint FRX.
If you require further assistance, please do not hesitate to contact our support team.
Device Installation
Guidelines
- Install the device only indoors, in a covered environment.
- Install the device in a location with sufficient lighting
- Do not use the facial recognition feature under a strong light.
- Do not expose the device to the sun for a prolonged period of time.
- Do not use in locations that are subject to high humidity. Excessive humidity may cause damage to the device's components.
- Do not install in locations with large temperature fluctuations throughout the day as this may affect temperature calibration and body temperature results.
- Choose an installation location that has a regular, room temperature - away from direct sunlight, excessive heat or cold air (e.g. directly facing an air conditioner). Excessively hot or cold temperatures may affect body temperature readings.
- Use our provided power adapter- connecting it to an improper power source may damage your equipment and lead to fire and/or damage.
- Keep the camera clean for optimum photos and facial recognition.
- Device should be installed facing directly forward with as little tilt or inclination as possible to ensure the best body temperature results.
Mounting the Device
WALL-MOUNT INSTALLATION
If you have purchased the wall-mounted version, the wall mount bracket would have come pre-installed onto the device.
To mount on the wall, use the appropriate screws (4) and wall anchors (4) for the type of wall material you are mounting the device to (screws and wall anchors not provided).
- Use a screwdriver to loosen the two screws on the sides of the bracket
- Remove the device from the bracket by sliding the bracket up or down from the device
- Locate an area on the wall where you want to install the device (be sure to follow the installation guidelines as mentioned before). Using a pencil and the bracket as a guide, mark the 4 holes that will need to be drilled into the wall.
Note: The bracket can be positioned in either orientation depending on how you want to position the wire cable. - Drill the 4 holes on the wall and put the wall anchors inside the holes.
- Position the flat side of the bracket against the wall and use screws to secure it into place.
- Hang the device onto the bracket by sliding it up or down onto the bracket.
- With a screwdriver, tighten the two screws on the sides of the brackets to secure the device into place.
CRADLE STAND INSTALLATION
- Mount the device and cradle stand on the surface.
- On the under side of the surface, put the neoprene O ring inside the hexagon nut and screw it onto the cradle stand until the device is securely positioned in place.
- Use a torx screwdriver to adjust the angle of the display panel. The angle can be changed up to ±30°.
Operating Instructions
Follow the device's instructions shown in the Notification Area when taking a test.
-
'Face camera. Keep face inside the frame'
Stand in front of the device, face the camera and position face within the Facial Recognition Frame shown on the LCD display.
Note: Be sure to follow the Facial Recognition Guidelines when facing the camera. - Device will analyse the results and display them in the Notification Area.
- If the temperature reading is above the Body Temperature Limit, an alert will sound and the test procedure ends.
- If the temperature reading is below the Body Temperature Limit, the test will proceed to the next step.
- Note: Body Temperature Limit is set under Advanced Settings.
- Results are synced to Andalink immediately after each test (if device is connected to the internet).
- A new user can take another test immediately by repeating from Step 1.
FAQs
1. Can a user delete or edit their details or test results?
No, this cannot be done on the device or in Andalink by any user (including by Admins or Managers).
2. How instant are the AccessPoint FRX's test results, changes and updates synced to Andalink?
They sync automatically every 10 minutes. You can do a Force Synchronisation to sync it instantly.
3. What will happen if the Wi-Fi or internet is down in my location?
The AccessPoint FRX will continue to operate and save test results offline. Once it is connected to the internet or Wi-Fi network again, it will sync the results to the Andalink.


